Returns overview
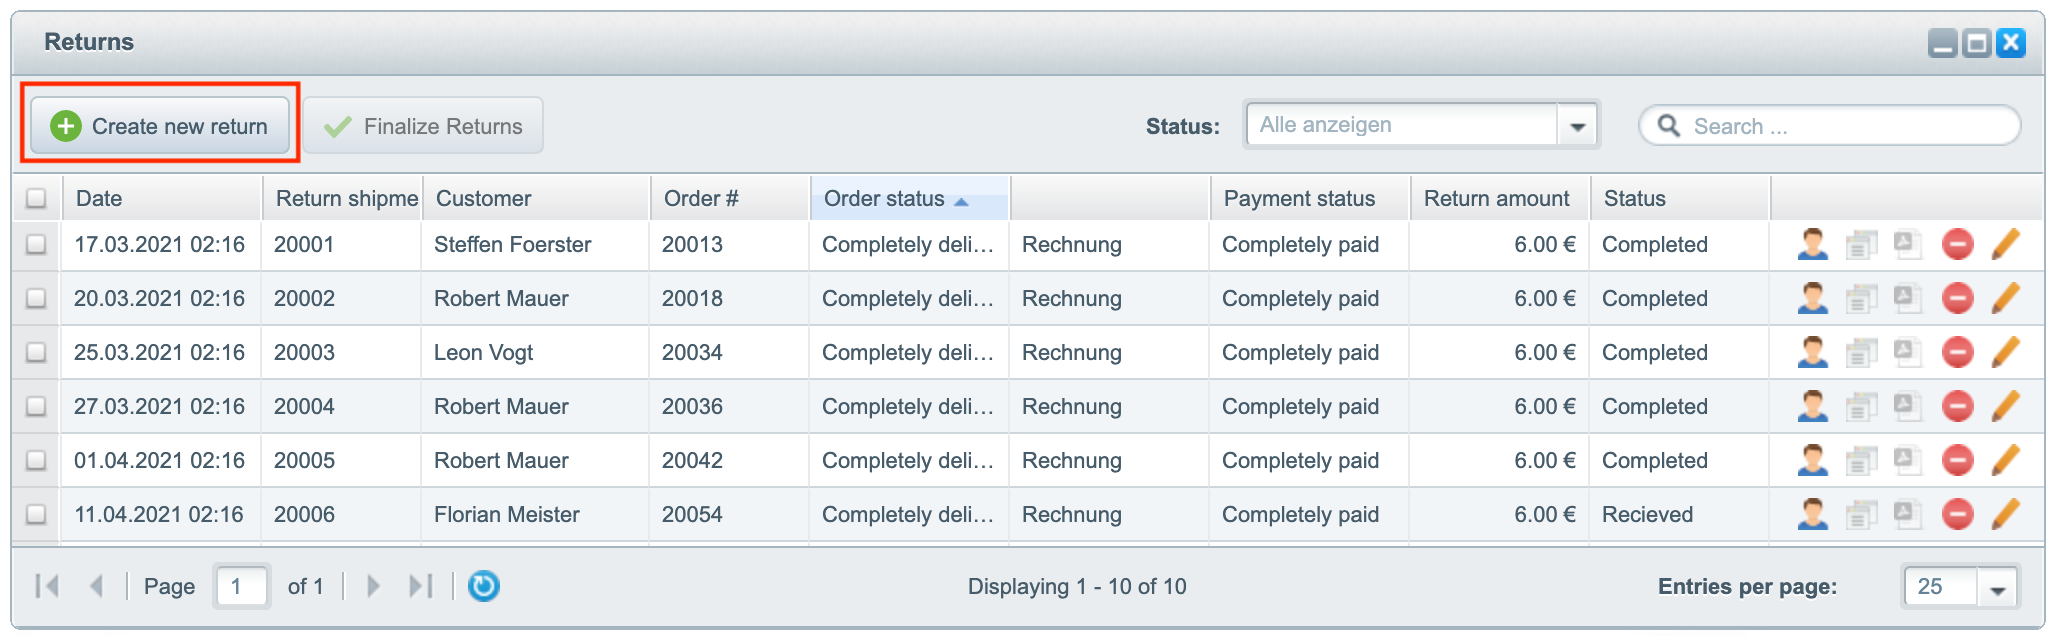
All returns are listed under Customers → Return shipments. Here you can search for individual returns, display only returns with a certain status or create new returns.In addition to the columns displayed by default, you can also display a variety of additional columns, such as the customer group, the shop or the number of items contained in the return.
Create a new return
There are two ways for creating a new return:
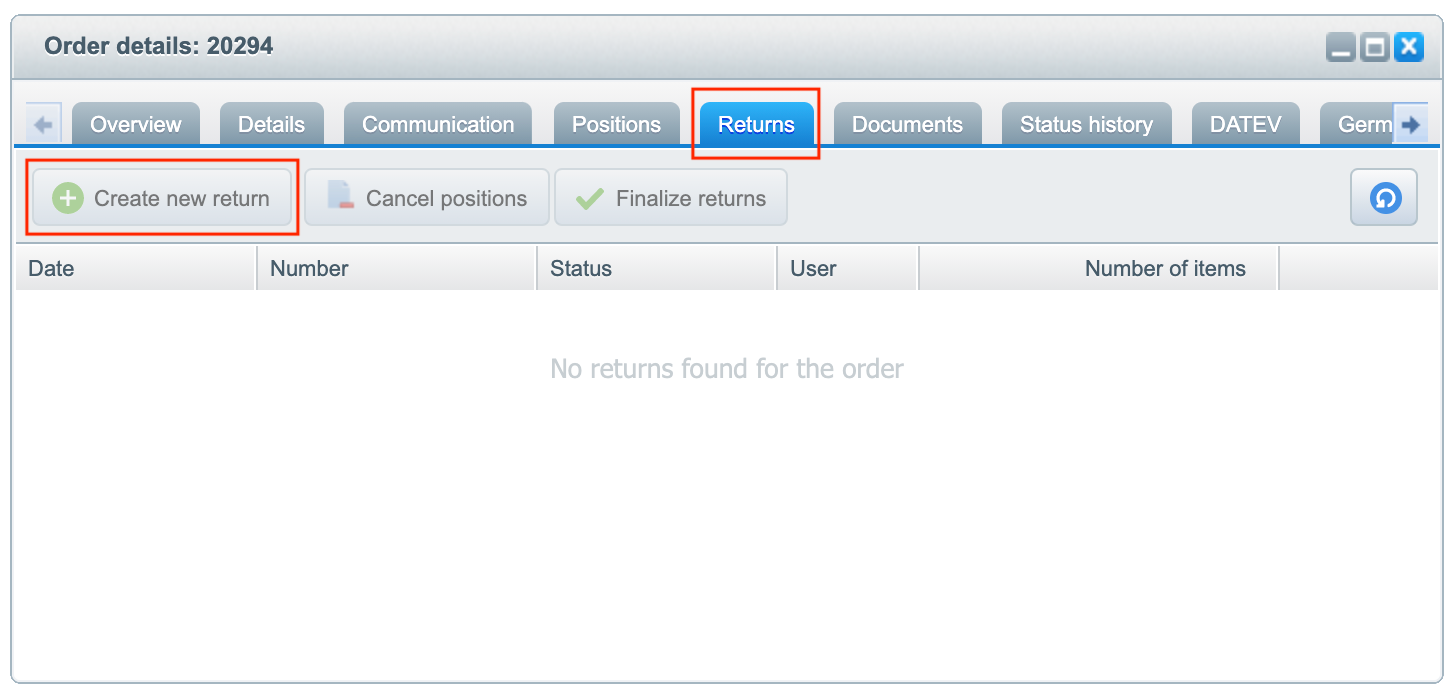
- Open the respective order, switch to the tab Returns and click on Create new return.
- Alternatively, click on Create new return in the returns overview. All orders suitable for return will now be displayed. Select the relevant order and then click on Create return.

Regardless of which starting point you have chosen, the Returns window will then open where you can add items and attachments as well as comments regarding the return.

The return is now in the status New. On the top left you can selet the target warehouse. Initially, the default returns warehouse defined under Items → Warehouse → Warehouse Management is preselected. By clicking on Add items, another window opens in which you can select which item(s) you would like to add to the return.
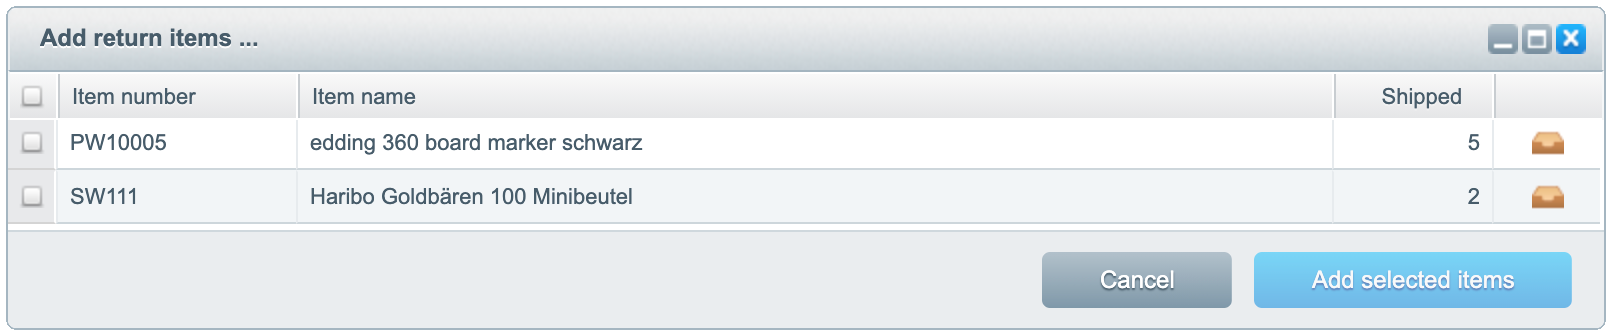
You can select from all the items in the order that have already been sent but not yet returned. Confirm your selection by clicking on Add selected items.
Back in the Returns window, you will see the selected items and can adjust the quantity to be returned. You can also write off returned items if they are damaged. These items will then not be added back to the physical stock. To do this, enter the desired quantity in Written off.
When all quantities are set correctly, save the return. The status of the return now changes into Received and the physical stock is adjusted according to the restocked items.

When the status changes to Received, a pop-up opens to confirm receipt of the return to the customer by email. You can customise the email template used for the confirmation in the backend under Configuration → E-mail management → Email Templates → User emails → PickwareReturnReceivedNotice.
Below you will find this process as a video tutorial:
Cancel returned items
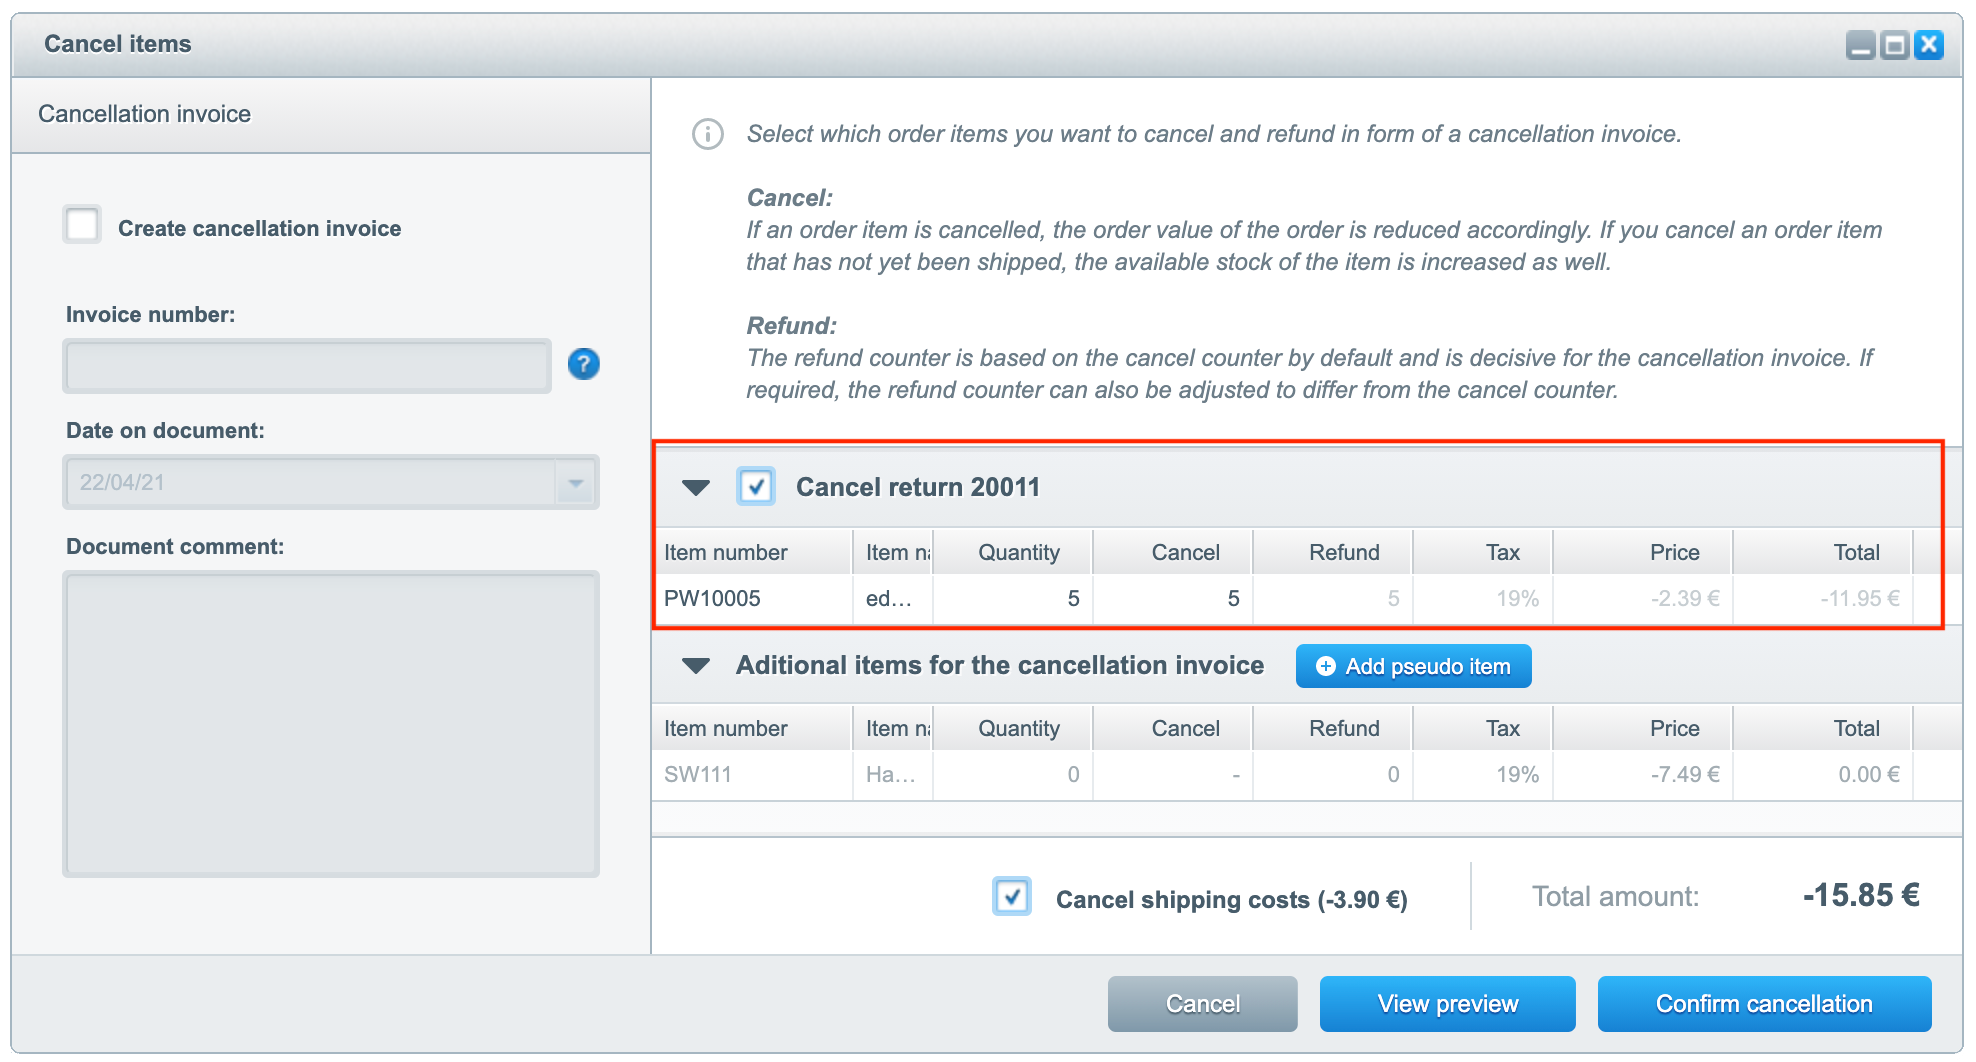
After the return is in the status Received, you can optionally cancel the returned items and refund them by issuing a cancellation invoice. To do this, click on Perform cancellation. In the Cancel items window you can now proceed with the cancellation according to the instructions described here. The status of the return is now Cancelled.
Complete return
To complete the return, e.g. as soon as the refund due to the customer has been made, click on Complete return in the Return window. The status now changes to Completed. A pop-up appears to confirm the completion of the return to the customer by e-mail and to send them the cancellation invoice. You can customise the email template delivered for this purpose in the backend under Configuration → E-mail management → Email templates → User emails → PickwareReturnCompletedNotice.
Another way to complete returns is via the returns overview under Customers → Return shipments. The advantages of this are that you can filter the returns by status and can also complete several returns at once.
This part of the returns process can also be found below as a video tutorial:
Delete returns
As soon as a return has reached the status Cancelled or Completed, it can no longer be subsequently changed, but only completely deleted. You can delete a return in the returns overview (Customers → Return shipments) or within the order in the tab Returns, in each case via the red delete symbol.
By deleting, all stock changes made during the return process are automatically reversed. If you have already created a cancellation invoice for the return and want to delete it, you need to remove it manually by going to the Documents tab of the order.