To create supplier orders click on Items → Purchase → Ordering → Create new order.
Select items for reordering
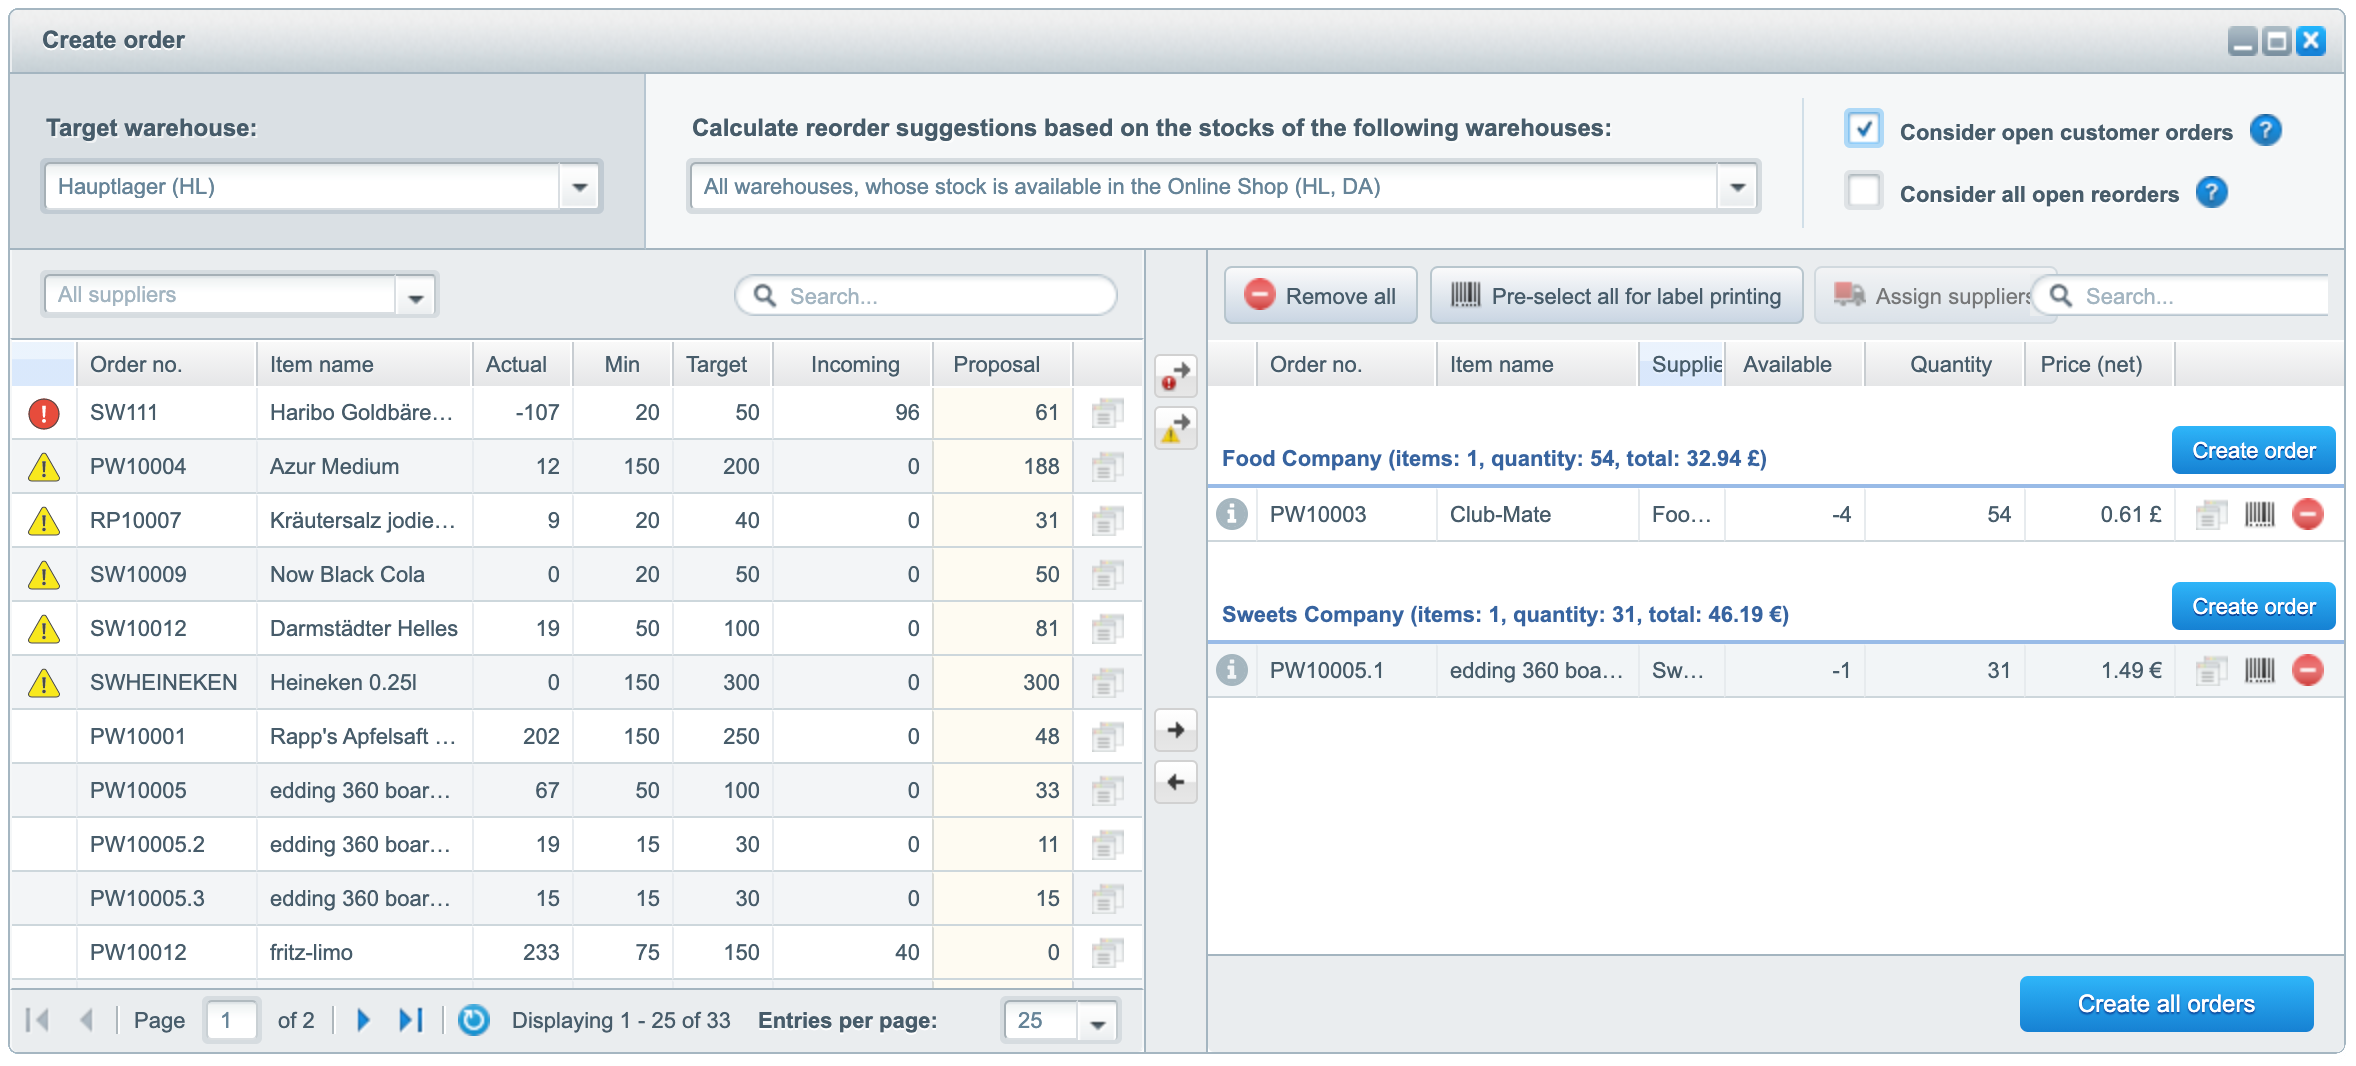
First select the target warehouse in the top left-hand corner. This will affect which address appears on the order form.
Below you can see all the items from your shop. Drag and drop the items for reordering onto the right-hand side or use the arrows in the middle. The item list can be sorted according to the different columns:
- Actual – This is the current available stock of an item in the warehouse selected above.
- Min/Target – The minimum and target stock can be set individually for each item in the item details.
- Incoming – This value results from already existing supplier orders which contain the respective item.
- Proposal – This value is calculated from the target stock minus the actual stock and is rounded up to the next larger number according to the packaging size and the minimum order quantity. packaging size and minimum order quantity are set in the supplier details in the item assignment tab. You can define which warehouses and whether open orders are to be taken into account for the calculation of the suggested quantity in the upper area next to the target warehouse.
- In the leftmost column you will see two different warning symbols. The yellow warning symbol means that the item in question is below its minimum stock level. The red warning symbol appears if the availability of the item is negative, i.e. more items have been ordered by customers than there are in stock. You will also find corresponding buttons in the middle to select the respective marked items directly for reordering.
Create supplier orders
If you have selected items for reordering, they are displayed on the right and sorted by supplier. The order quantity matches the value in the column Proposal, but can be adjusted afterwards. If you have assigned the items to a supplier and entered the corresponding data, the purchase price, expected delivery time, etc. will be added automatically.
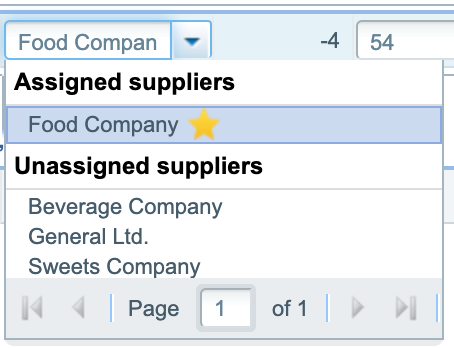
When a supplier other than the default supplier is selected, this will be indicated by the lightning symbol next to the name of the supplier.
The supplier can be changed by clicking on the supplier for the respective item and selecting the desired supplier from the drop-down menu. The suppliers are grouped into Assigned Suppliers and Unassigned Suppliers, the default supplier is marked with an asterisk.
If basic data on a supplier is missing, it must be added manually before the order can be created.
You can also select all or certain items for label printing by clicking on Pre-select all for label printing or on the barcode symbol in the line of the respective item. The selected items will then appear under Items → Barcode labels → Printing.
You can create each supplier order individually or all at the same time by using the corresponding buttons. You can then find the generated orders under Items → Purchase → Ordering.
Send supplier e-mail
By clicking on the email symbol, you can send the order form directly to your supplier by email. Alternatively, you can download the order form as a PDF file for further use. You can also customise the supplier documents according to your wishes.
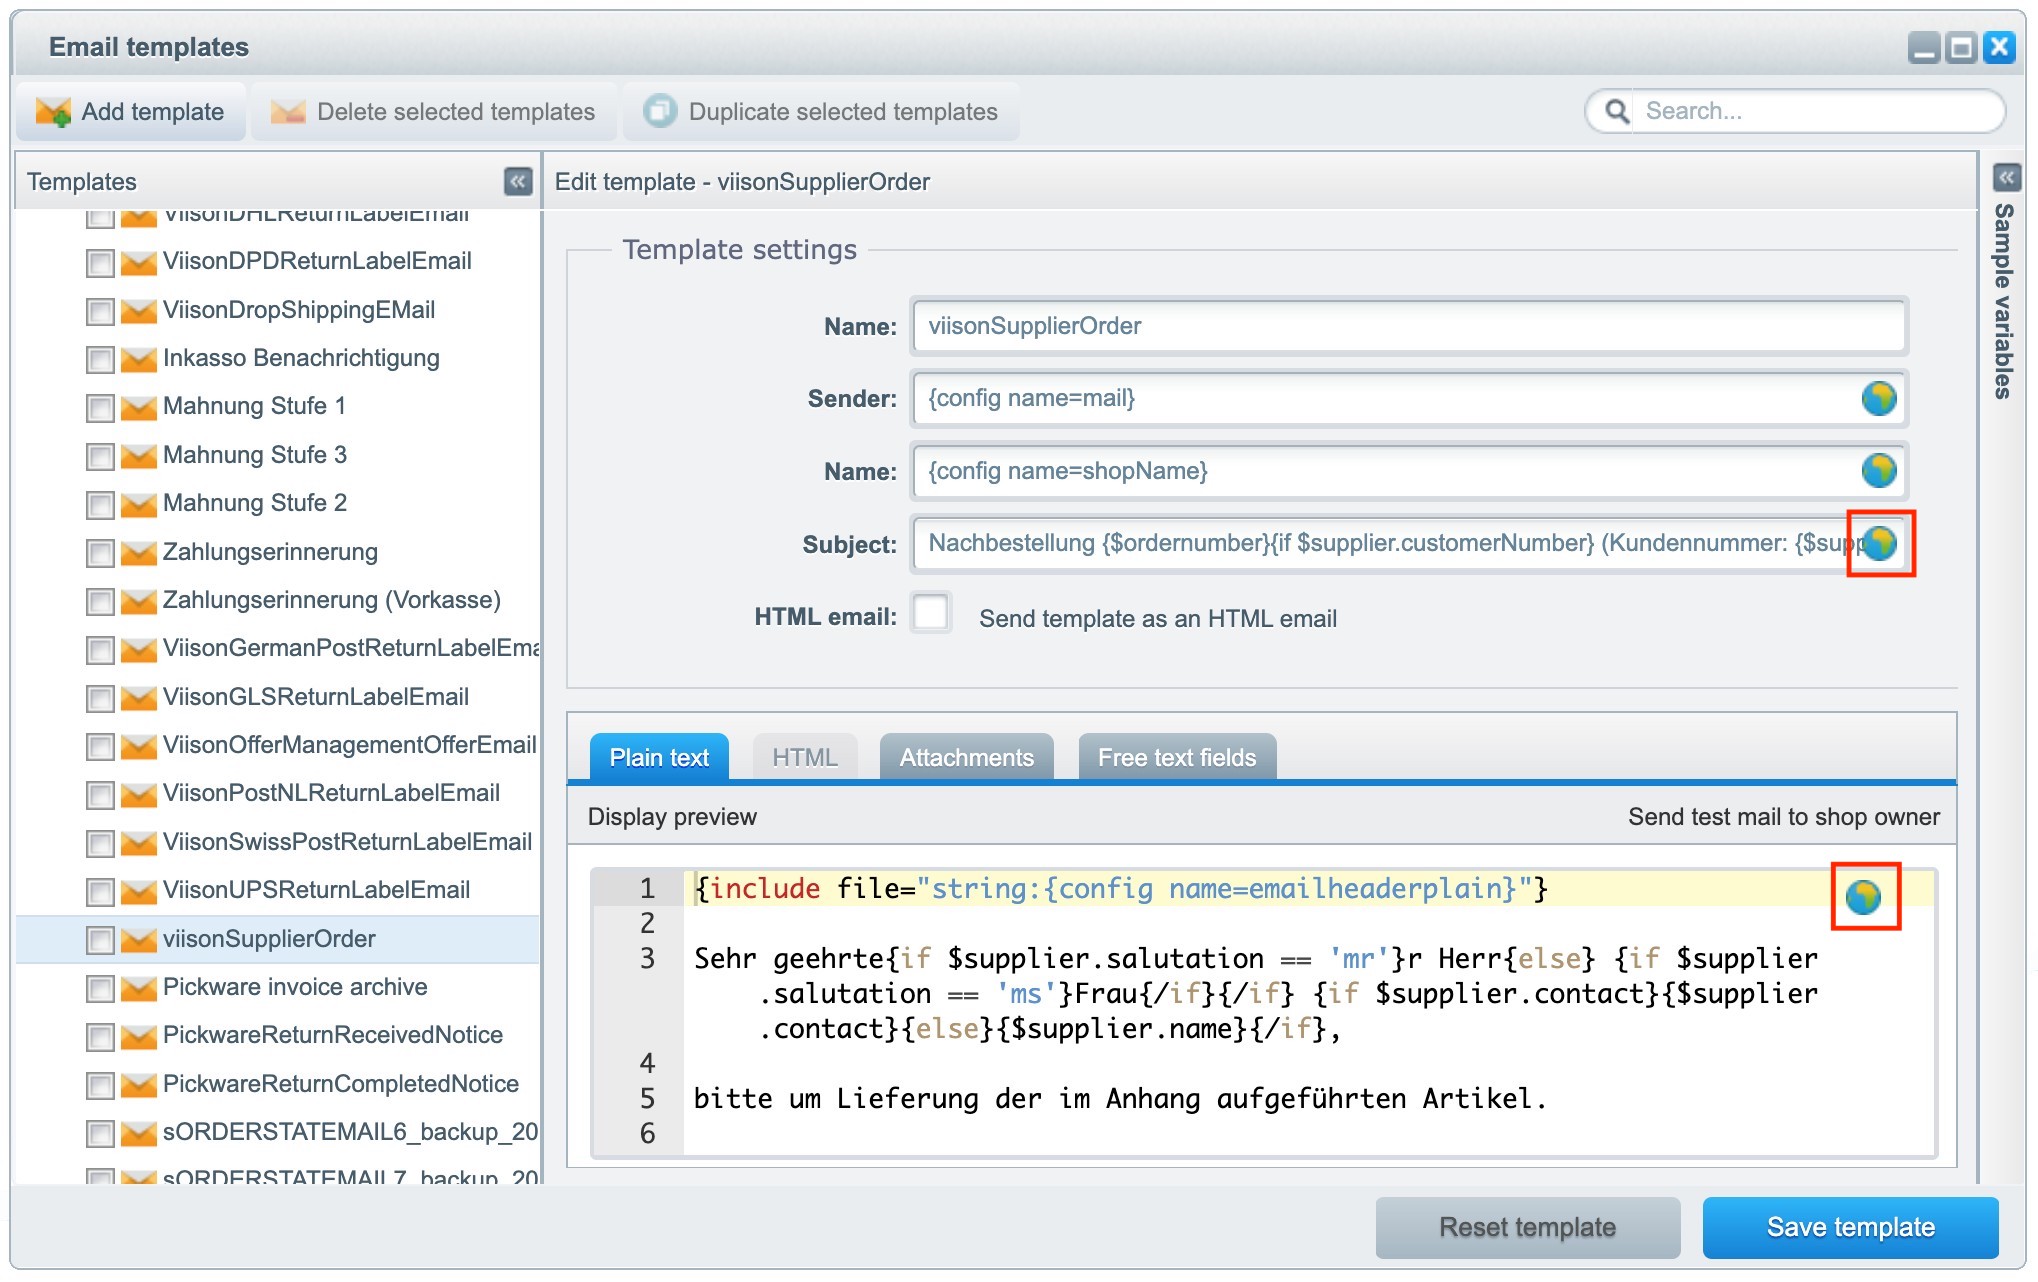
Customise and translate supplier e-mail
The email that is sent to the supplier can be found under Configuration → E-mail management → Email templates → User emails → viisonSupplierOrder. There you can customise the email template and add translations. For translations, click on the globe symbol next to subject or in the tab Plaintext and then select the desired language for which you want to add a translation.