Click on Items → Warehouse → Warehouse Management to view and manage the existing warehouses and to create new warehouses. Initially, the main warehouse (HL) has already been created.
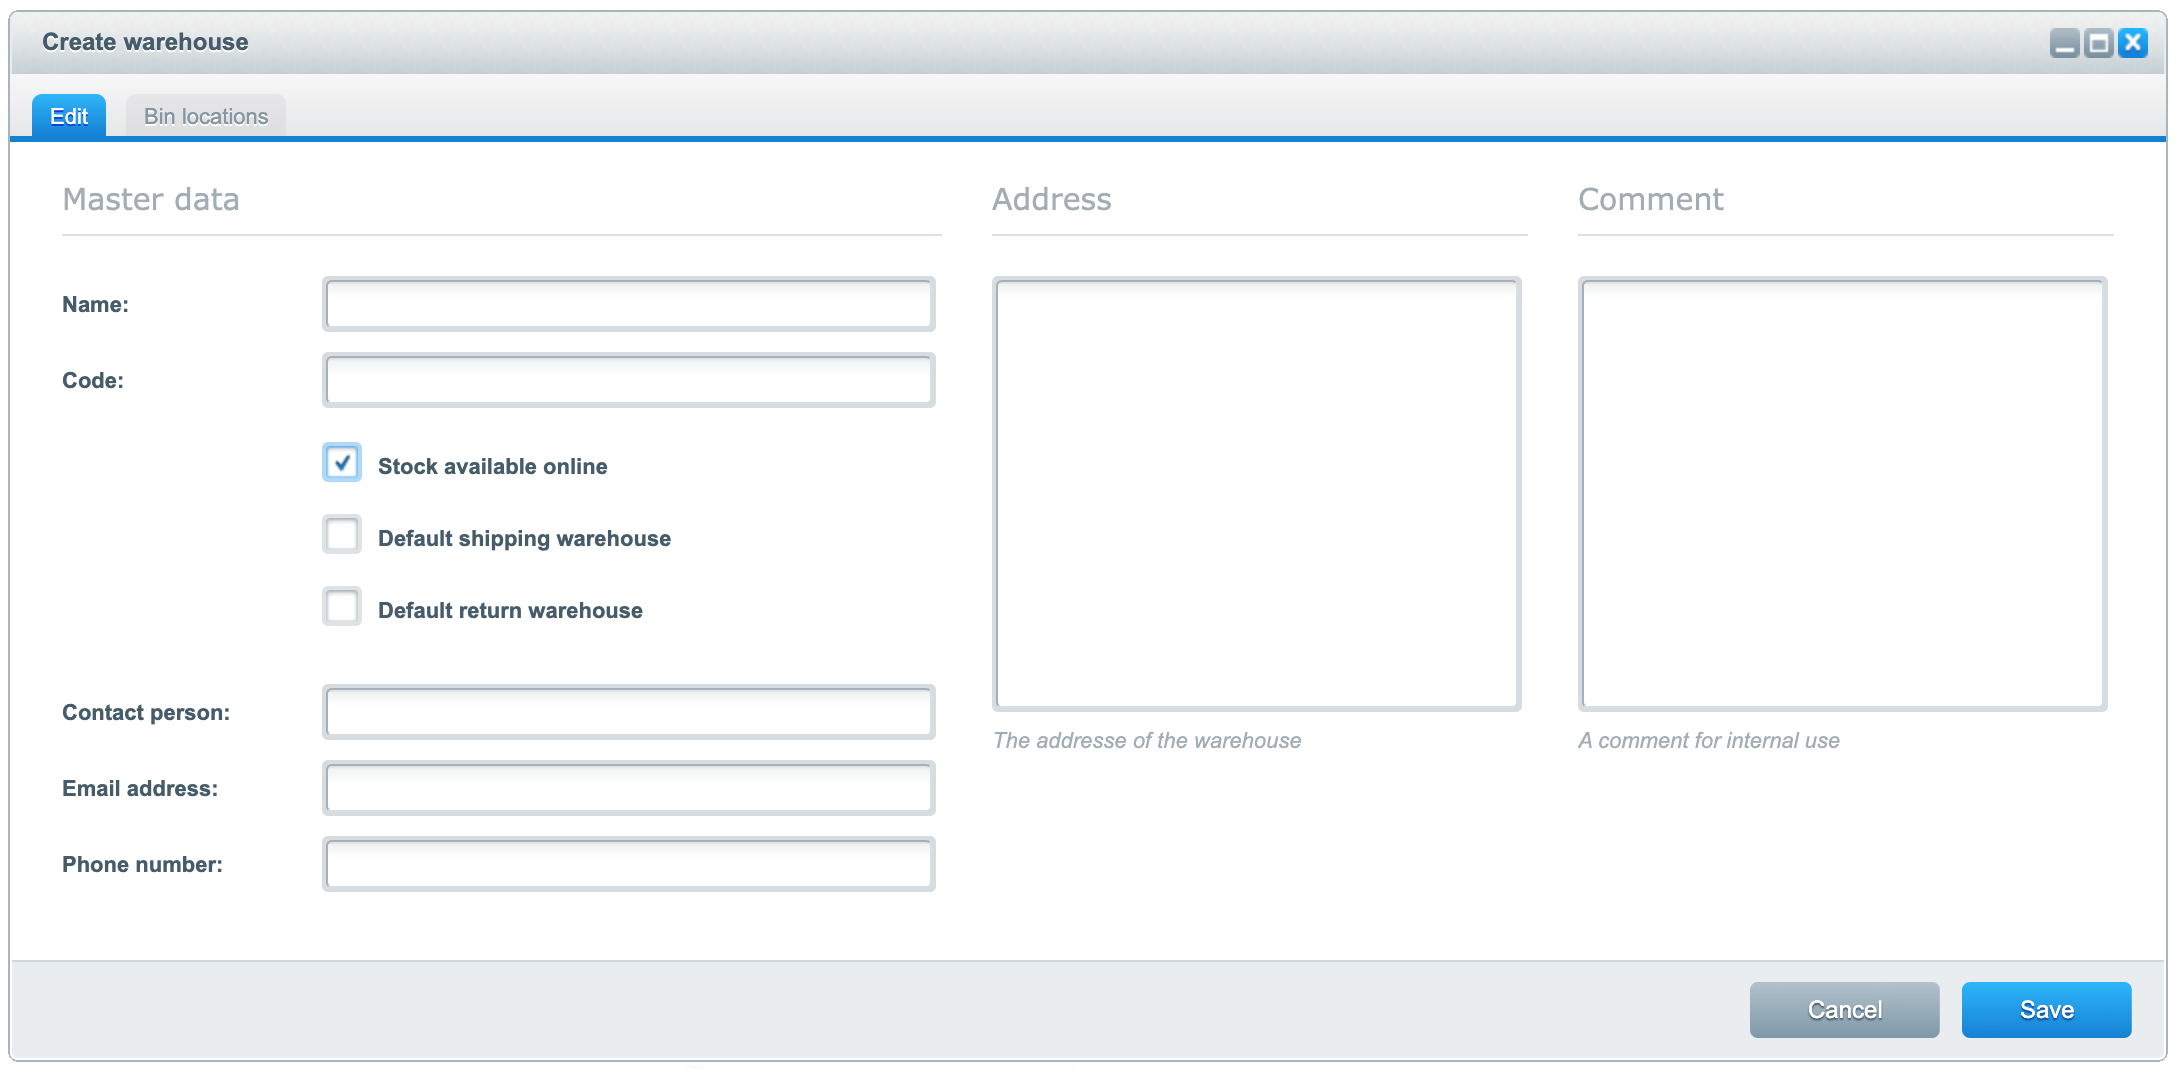
To create a new warehouse, click on Create new warehouse. The following window opens:

A name and abbreviation must be set for each warehouse before it can be saved.
From all warehouses, a default warehouse for shipping and for returns must be defined. Initially, if only the main warehouse exists, this will also be the default warehouse for shipping and returns. If you want to delete a warehouse that is marked as the default warehouse, you first have to designate another warehouse as the default warehouse. As soon as you have activated the corresponding option in the new warehouse, it will automatically be deactivated in the other warehouse and you can delete it.
In order for the stock of a warehouse to be taken into account for sales in the online shop and to count towards the physical stock, the checkbox Stock available online must be activated. If this is not the case, the stock of the respective warehouse is only displayed in the item details in the section Warehouse. This is helpful, for example, if you have separate store warehouses whose stock should not be available in the online shop.
The contact person of the warehouse and the address can be entered directly when the warehouse is created or later on. When you create a supplier order for this warehouse, this data is automatically displayed on the letterhead as the delivery address.
As soon as you confirm your data by clicking the Save button, the tab bin location is activated. You can find out how to create bin locations here.