In this article you will learn how to perform your stocktake with Pickware ERP. You can also find these instructions in the video tutorial below. In addition, we recommend our blog post, which introduces you to the advantages of a permanent stocktake.
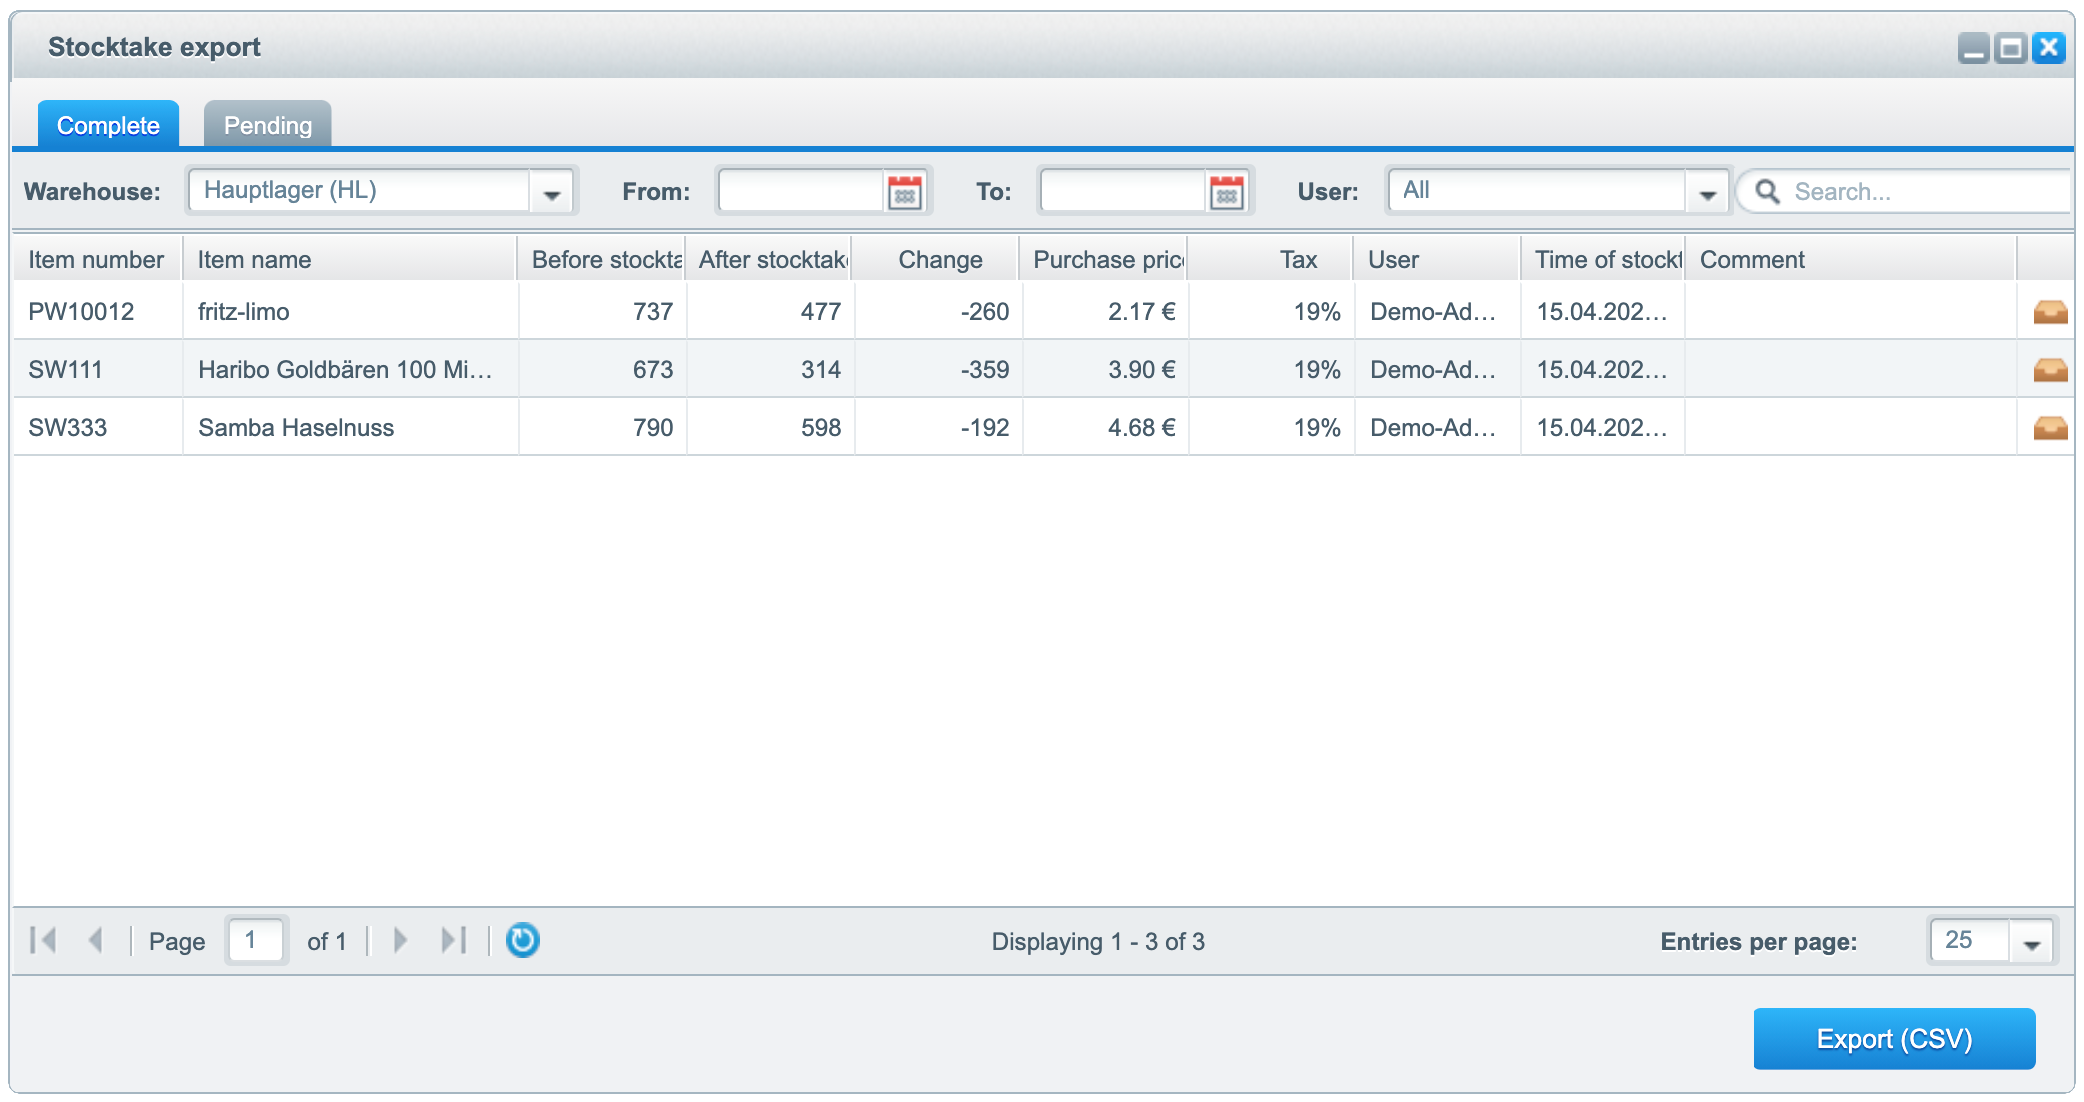
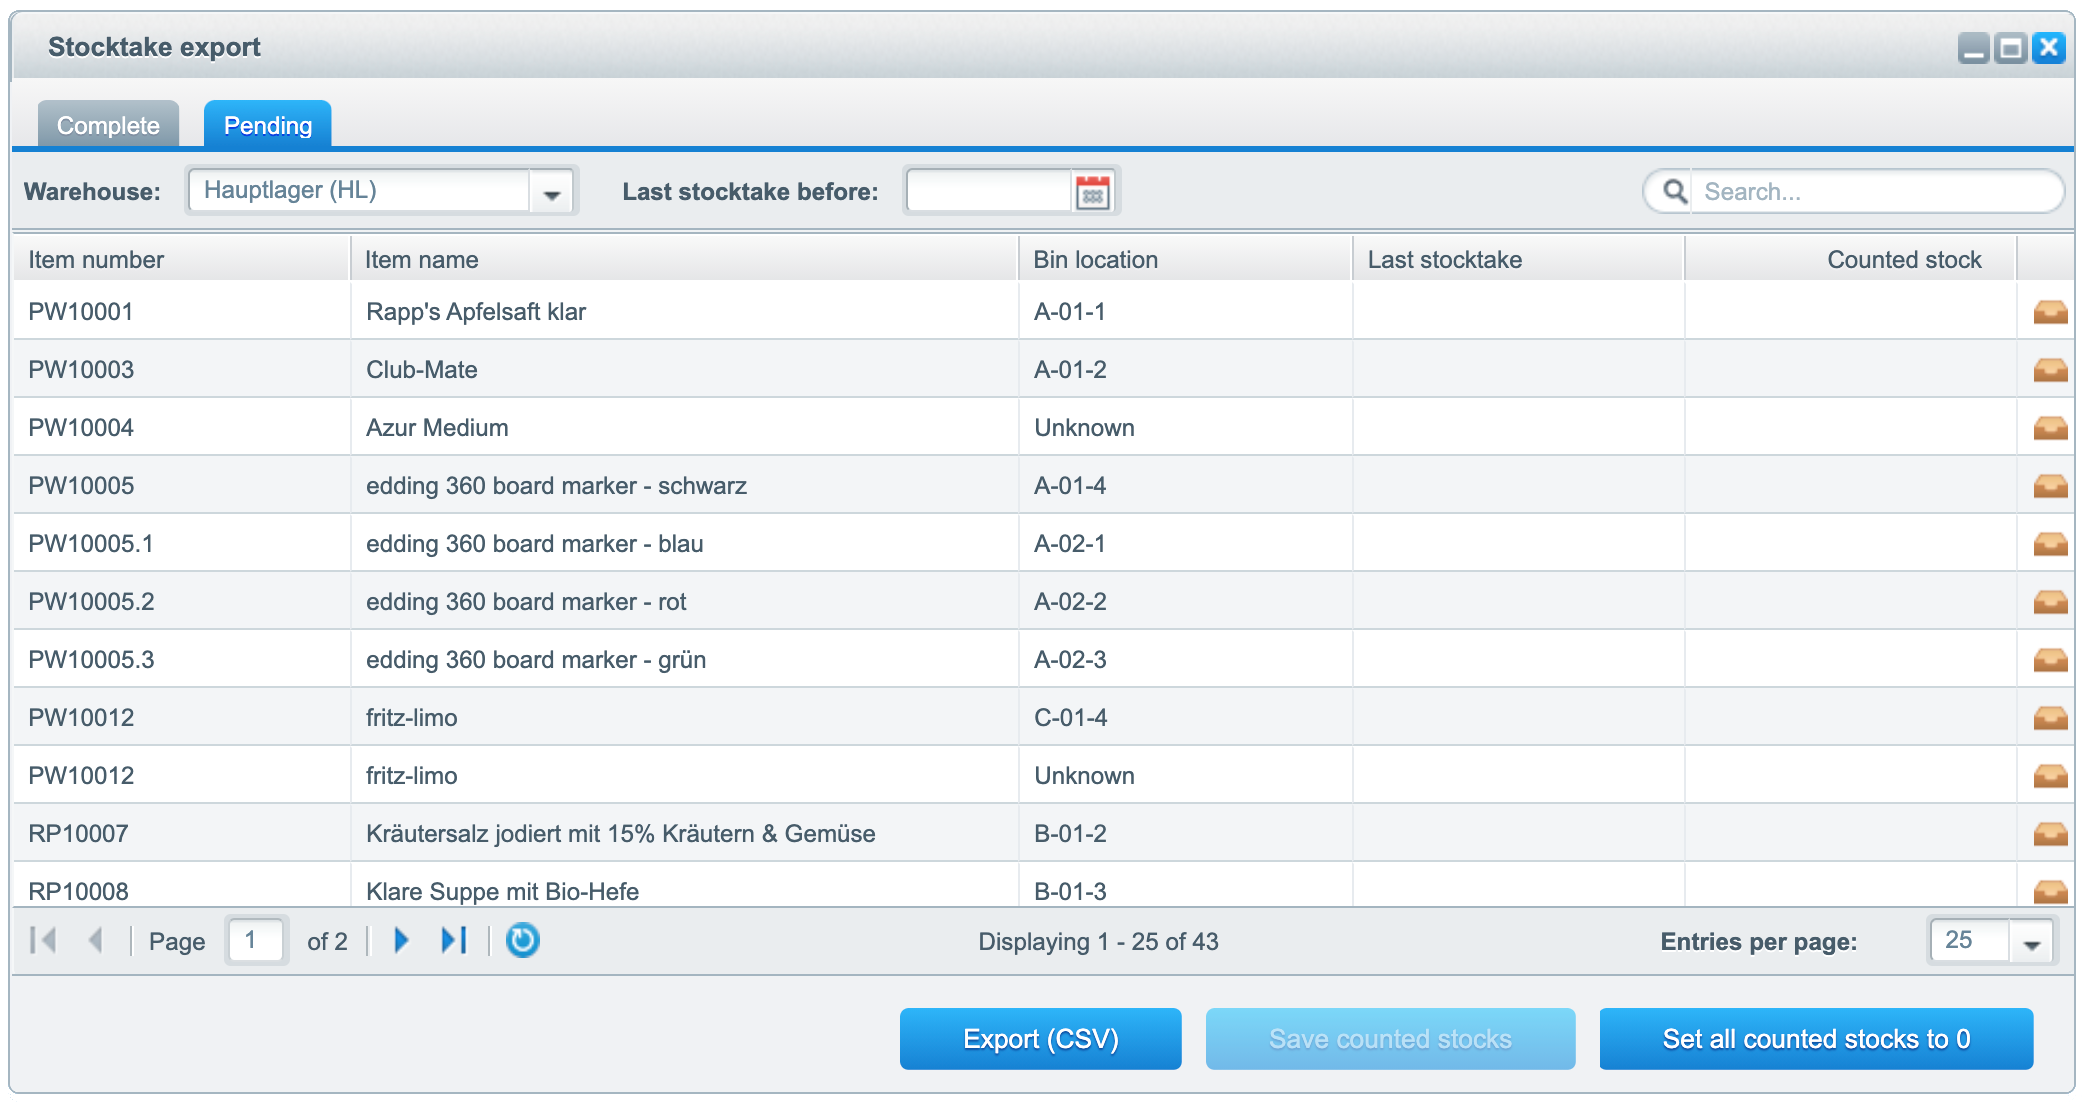
To start the process, open the Stocktake export under Items → Warehouse. You will find two tabs there: Complete and Pending. Below the tab selection you can select the warehouse.
In the tab Complete, you will see all items that are stored in the selected warehouse. Identical items in different bin locations are grouped together in one position. You can filter the displayed results by any period and by user. If there were stock differences during the last stocktake, they are shown in the column Change.

To enter stocks, switch to the tab Pending. Select the beginning of the current business year as date at the upper part of the screen. This way, only items are listed for which a stocktake has not yet been performed in the current financial year. Now double-click in the corresponding row in the column Counted stock for the item whose stock you want to enter and type in the number. In contrast to the tab Counted, items are displayed per bin location, i.e. an item that is located in several bin locations has several entries. Therefore, make sure you select the correct entry.
You can also use Export (CSV) to download the entire overview as a CSV file, print it out, note the stocks on paper and enter them later in the backend.
Once you have entered all the stocks, click on Save all counted stocks. Afterwards, if there are several items left that you want to remove from the range and therefore want to clear their stocks, you can use the button Set all counted stocks to 0.

Now switch back to the tab Complete. There you will find all newly counted items including any inventory differences. In this case, the stocks have already been corrected automatically. Click on Export (CSV) to generate a CSV file.