Label printing
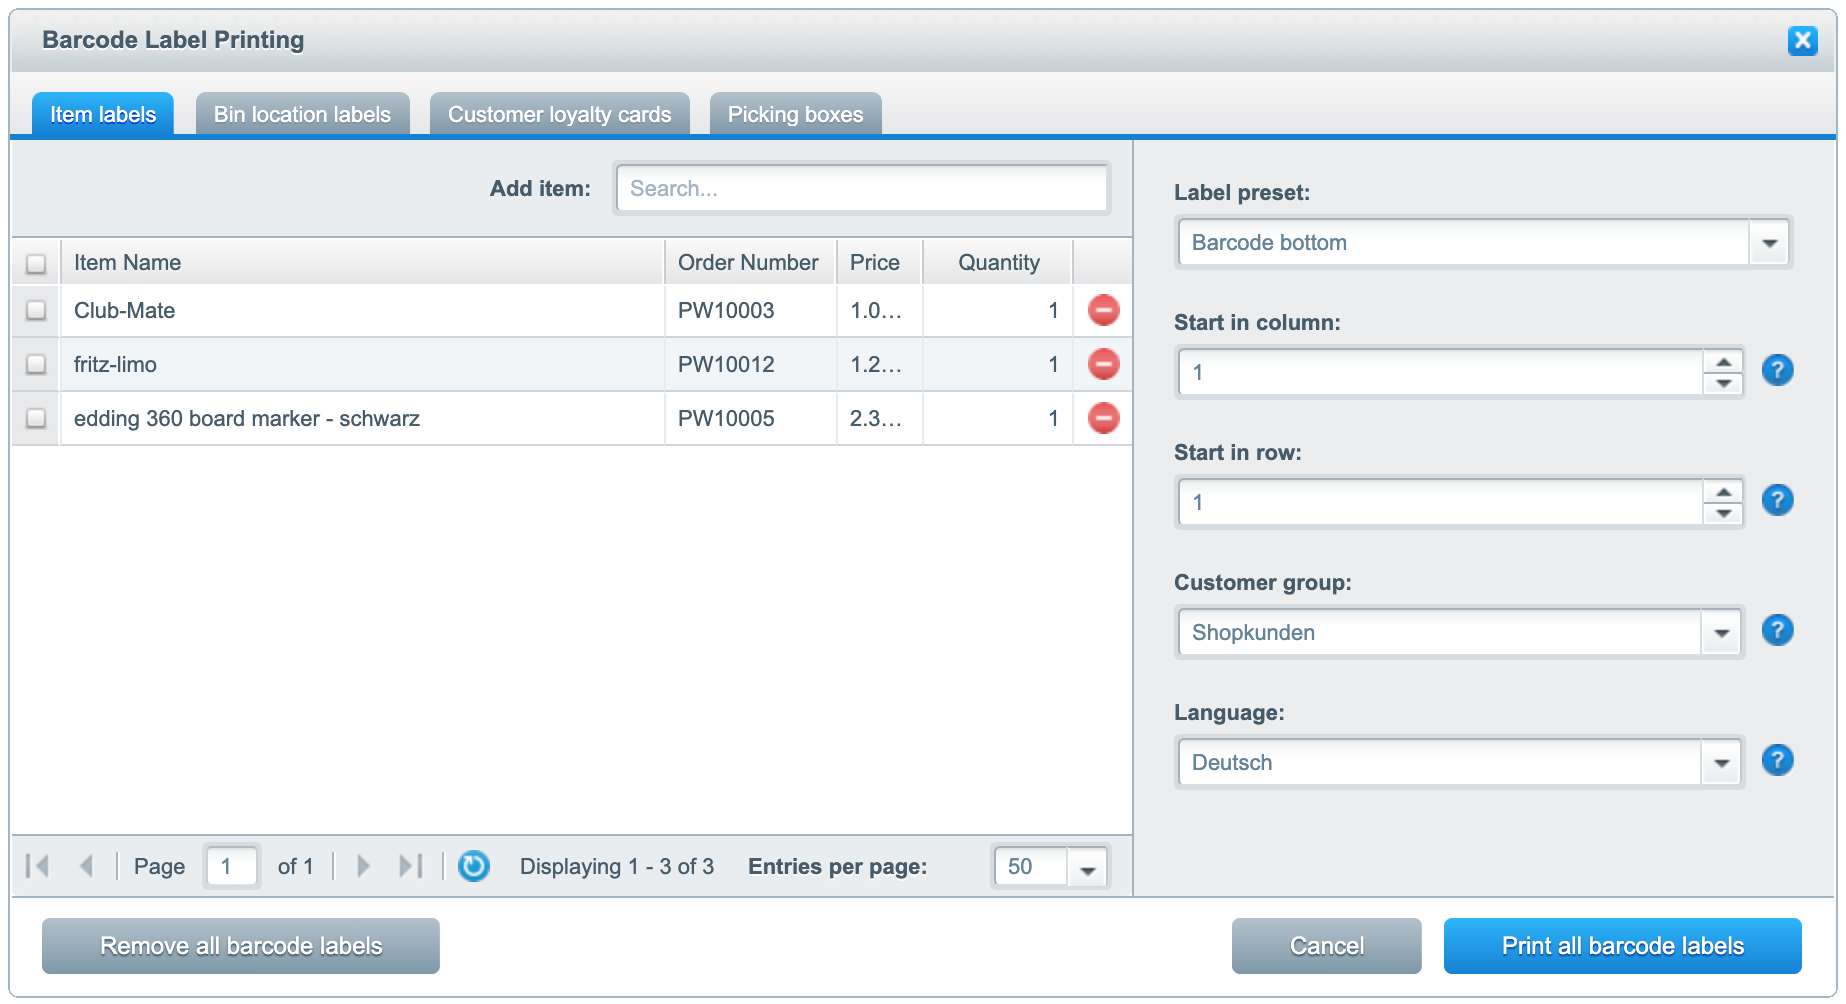
The label printing can be found under Items → Barcode labels → Printing. Use the tabs to select the type of label you want to print. Please also refer to the following table:
| Label type | Required plugin |
|---|---|
| Item labels | ERP |
| Bin location labels | ERP |
| Customer loyality cards | POS |
| Picking boxes | WMS |
If articles, bin locations or customers have been marked for label printing, they are displayed here in the corresponding tab. For instance, articles can be marked for label printing when placing a new supplier order, in the item overview by clicking on the button Pre-select all for label printing resp. Pre-select chosen for label printing or in the article details by clicking on the barcode symbol next to Item number.

You can also add more items, bin locations or customers via the search field and then select the desired label template on the right-hand side and make further settings for printing.
Label configuration
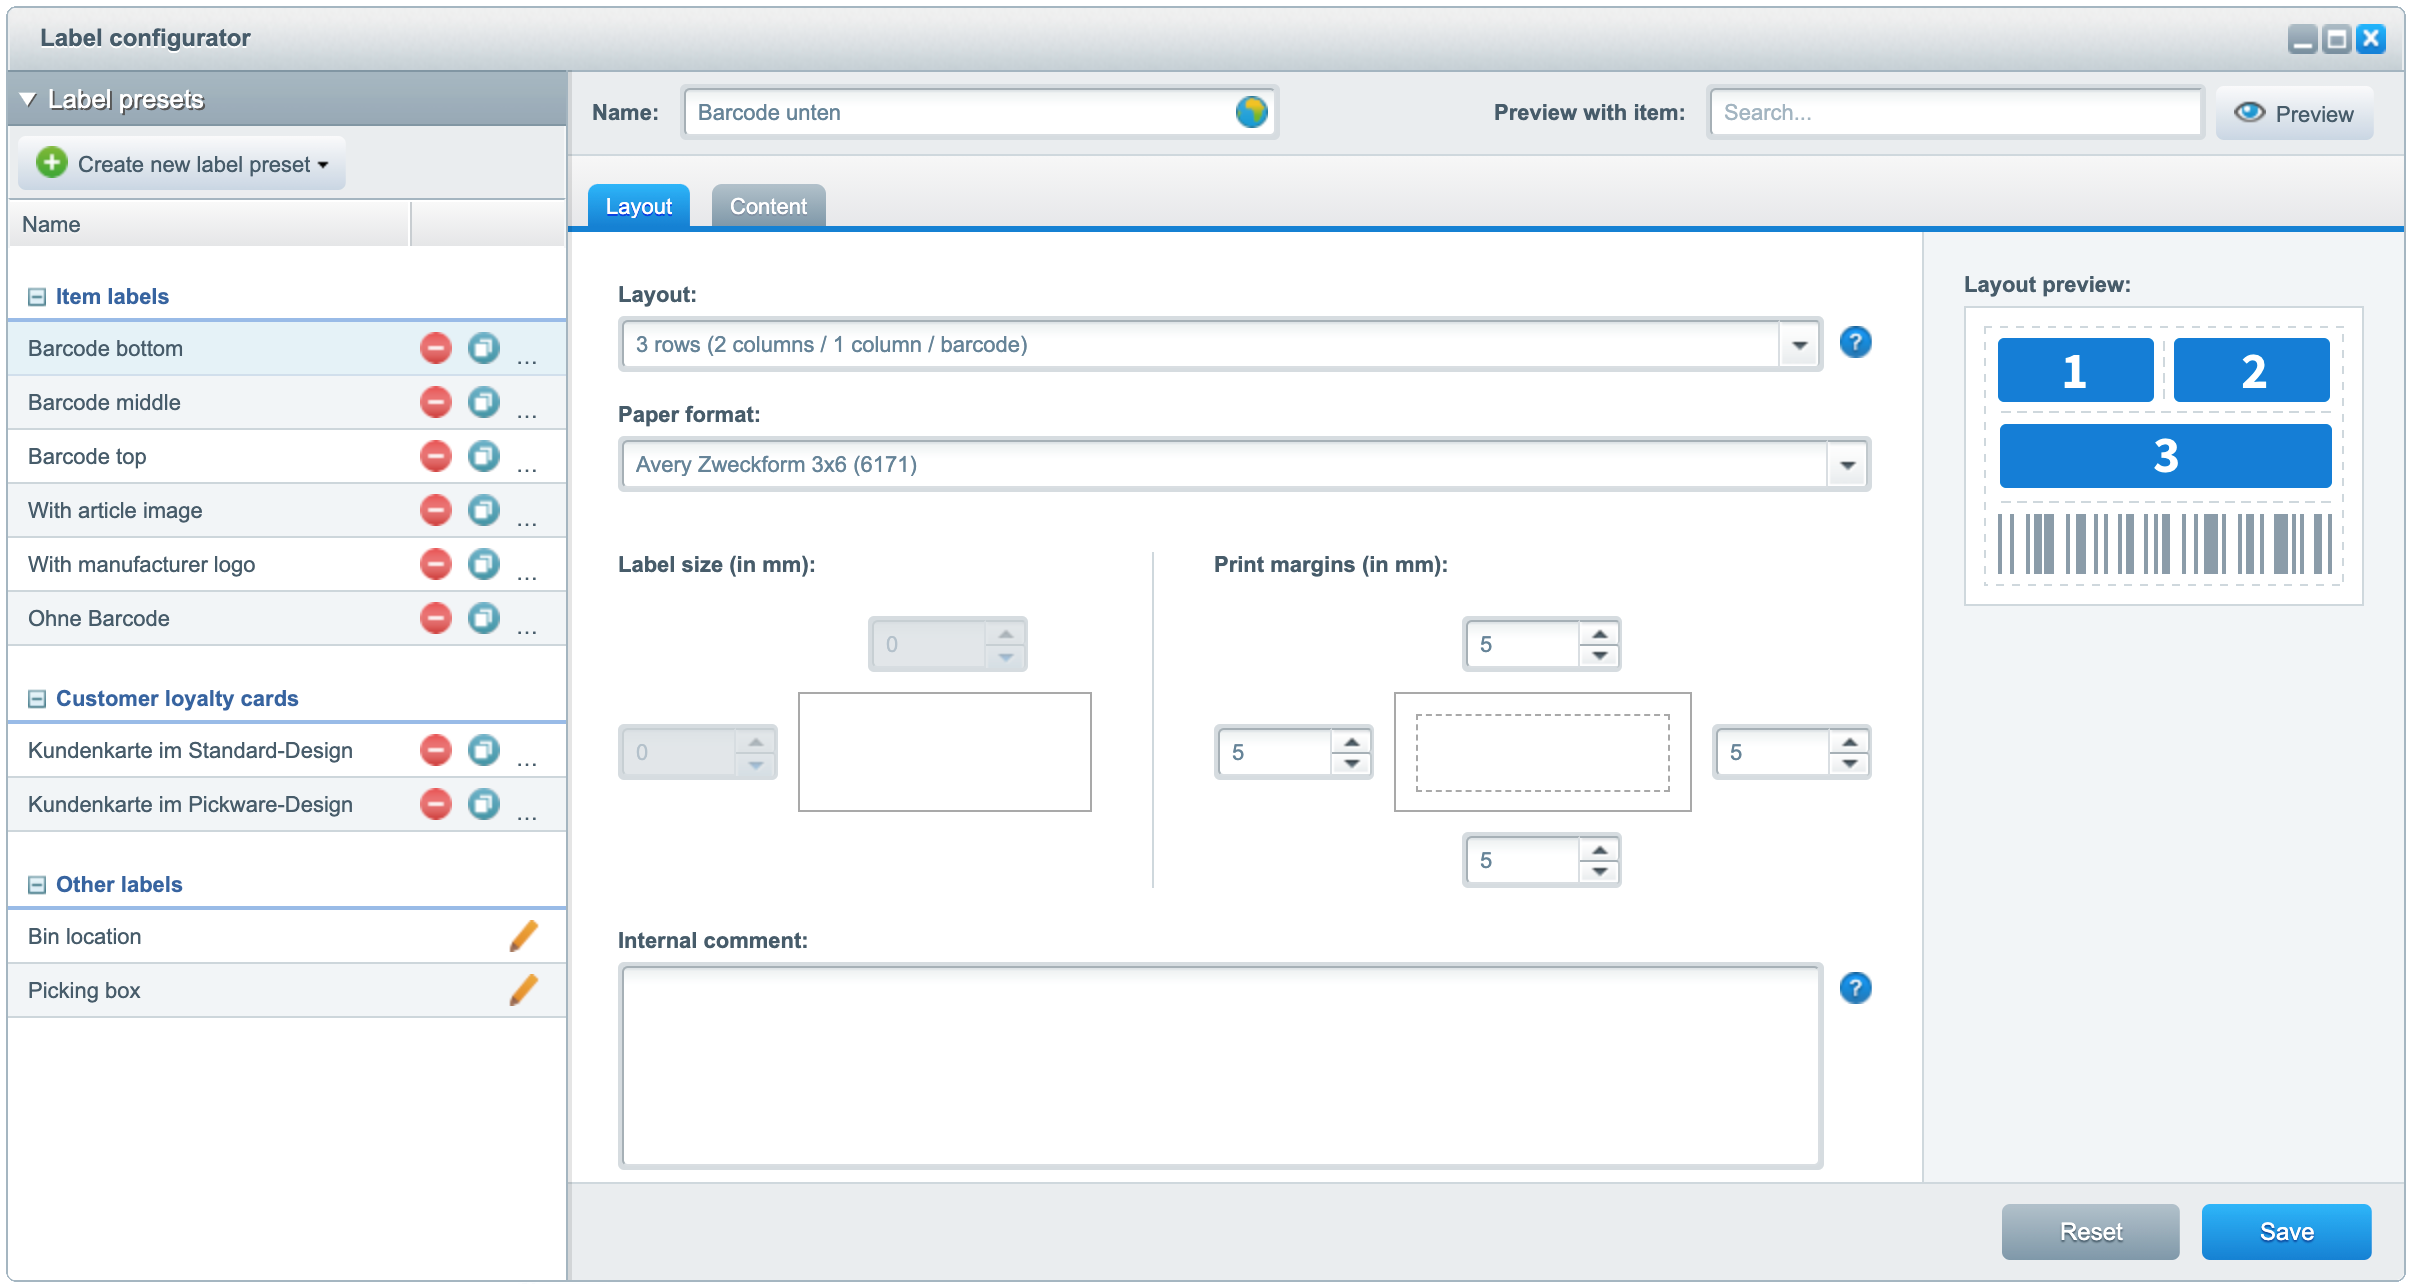
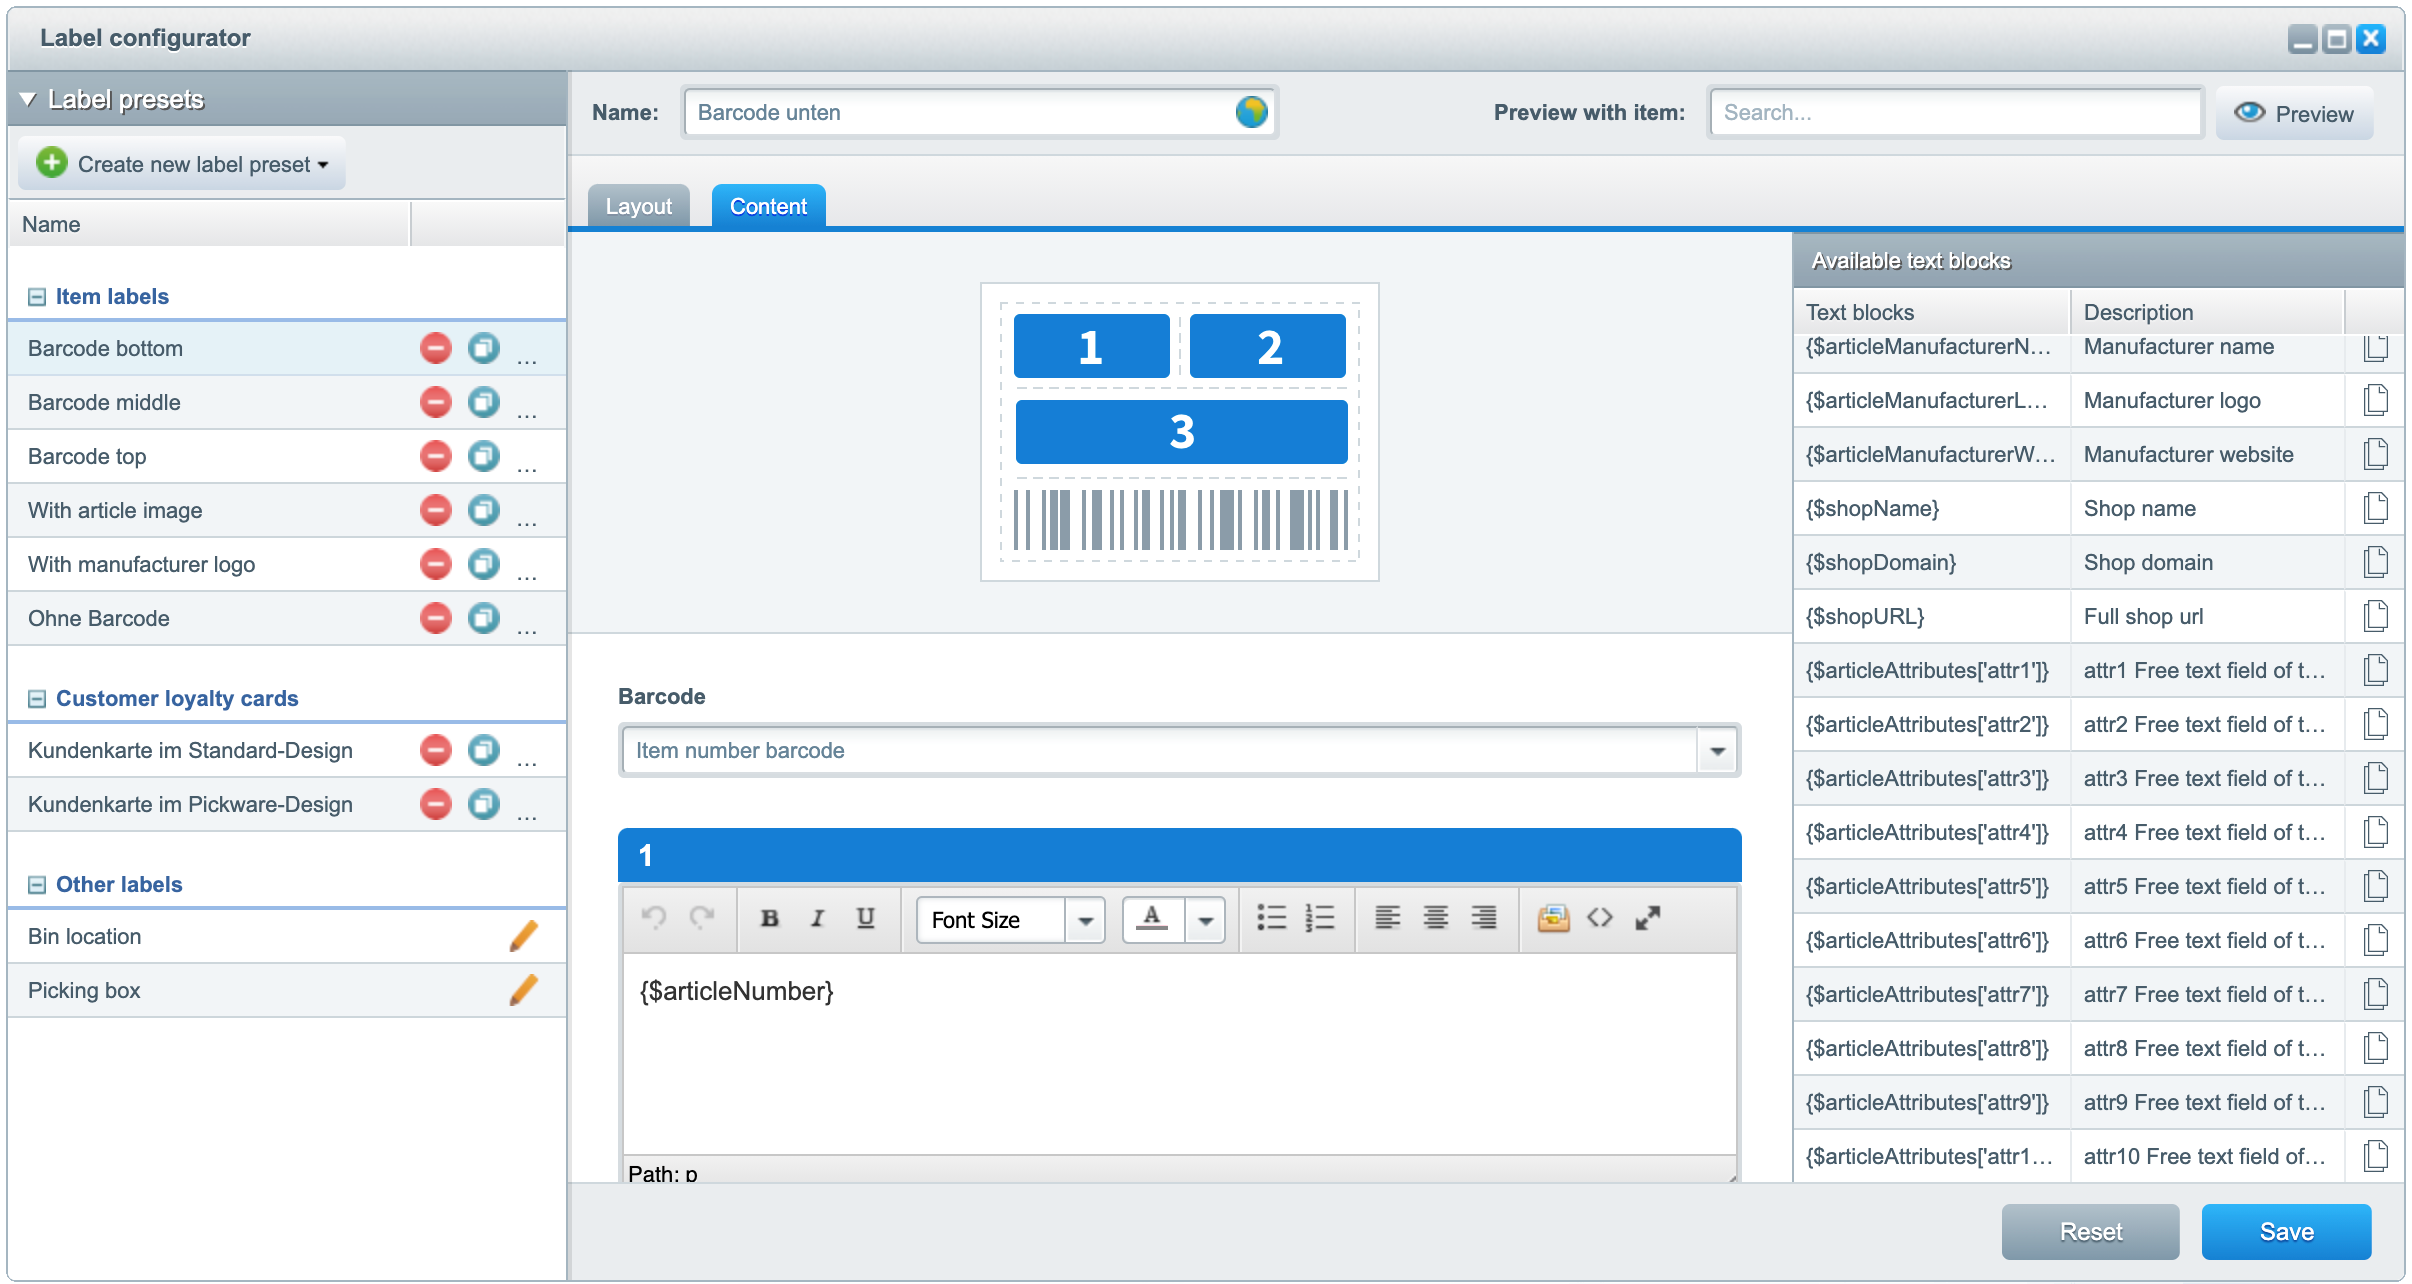
In the label configurator you can create new templates for label printing and edit existing templates. You can find it under Items → Barcode labels → Configuration. First select one of the existing templates or click on Create new label preset. On the right side of the window you can now make the adjustments.
Tab Layout - Here you can select a suitable layout and page format for your label. If using a label printer, select Single label and then set the page lengths individually under Label size. The templates will automatically adjust to the size of the labels. You can check each change to your template in the top right-hand corner with any item using the preview. For bin location labels as well as picking box labels, you can also edit the label size and print margin if you select the Single label page format for this.

Tab Content - Here you can define the content of the individual fields of the label. Under Barcode you select whether the EAN number or the Shopware item number is to be encoded in the barcode. The available text fields are displayed on the right. By clicking on the clipboard icon you can copy the text block to your clipboard and then paste it into any area on the label. Using the free text fields, which can be found under the designation {$articleAttributes['attr1']} to {$articleAttributes['attr20']}, you can also add individual information, such as ingredients, to the label.

Note: The default font size is 12pt. For small formats, the font size should be adjusted accordingly.
Further options for customising item labels
If you would like to further customise the templates for item labels, you will find our preconfigured templates under
/Shopware/Plugins/Community/Core/ShopwarePickwareERP/Views/documents/barcode_label_templates/
as well as a description of how and where to save your own templates in the first 17 lines of the .tpl file:
- Custom templates may be added to the Shopware root in folder
/themes/Frontend/Bare/documents/viison_pickware_barcode_label_templates/.

- Add a preview image by adding a PNG file to the custom labels directory
 with the same name as the custom label.

  e.g. my-custom-template.tpl and my-custom-template.png

Configurable text elements:

- To add a configurable element just add a block with the name
barcode-label-content-box--my-name.

- To add a barcode the name has to be barcode-label-content-box--barcode.

- Configurable blocks in comments are also parsed and shown!

Template names:

To give the template a name, please add a snippet with the name
template/file_name_without_tpl_extension/name in the namespace
backend/viison_pickware_common_barcode_label_presets
/barcode_label_templates
Note about updates
When you update our apps, the changes you have made may be overwritten. To prevent this, follow the steps below:
- Copy the .tpl-Datei into the folder /themes/Frontend/Bare/documents/viison_pickware_barcode_label_templates/ and make your preferred changes to the template there.
- Choose an individual filename
- Search the database in the table pickware_erp_barcode_label_presets for the appropriate entry according to the type (for example bin_location for bin locations labels) and enter the new file name in the field templateIdentifier.
This way, your changes will be preserved when updating.